Create webhooks
Webhooks can be created to notify you of changes in your account. DG AutoCheck will send a POST request to an endpoint URL you've specified whenever selected actions happen within your account.
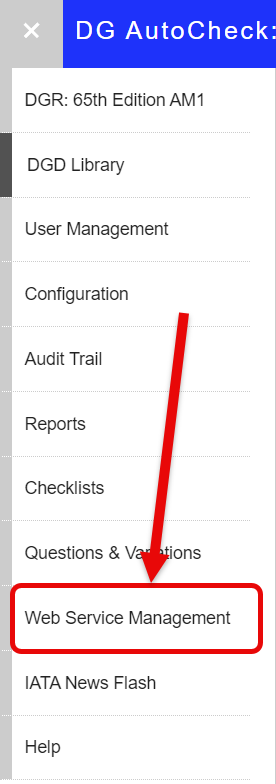
1. From the main menu, click Web Service Management
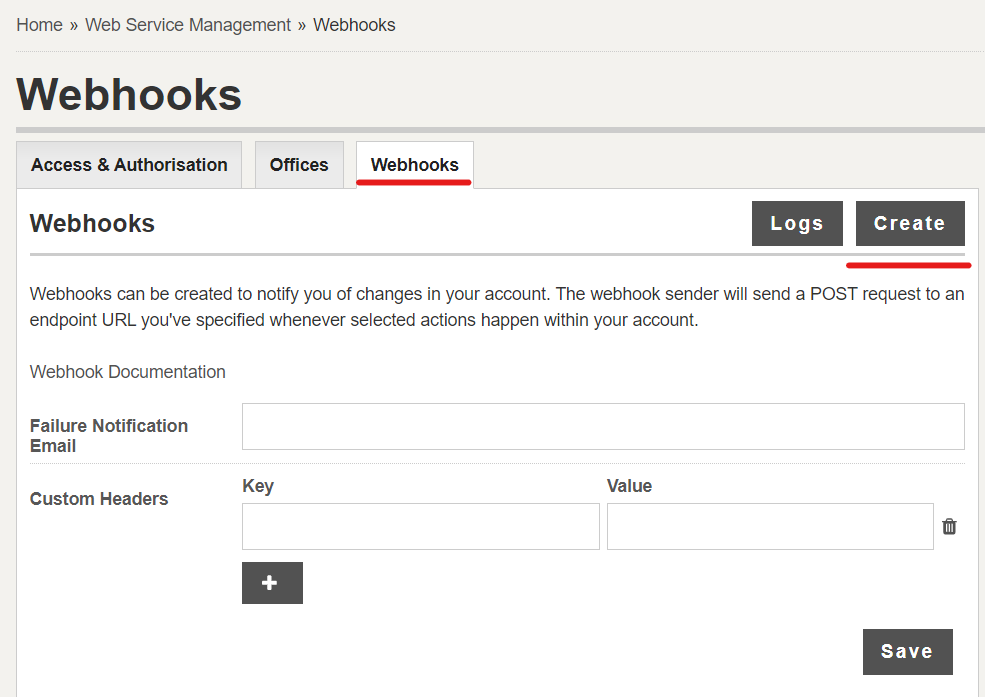
2. Under Webhooks, click Create
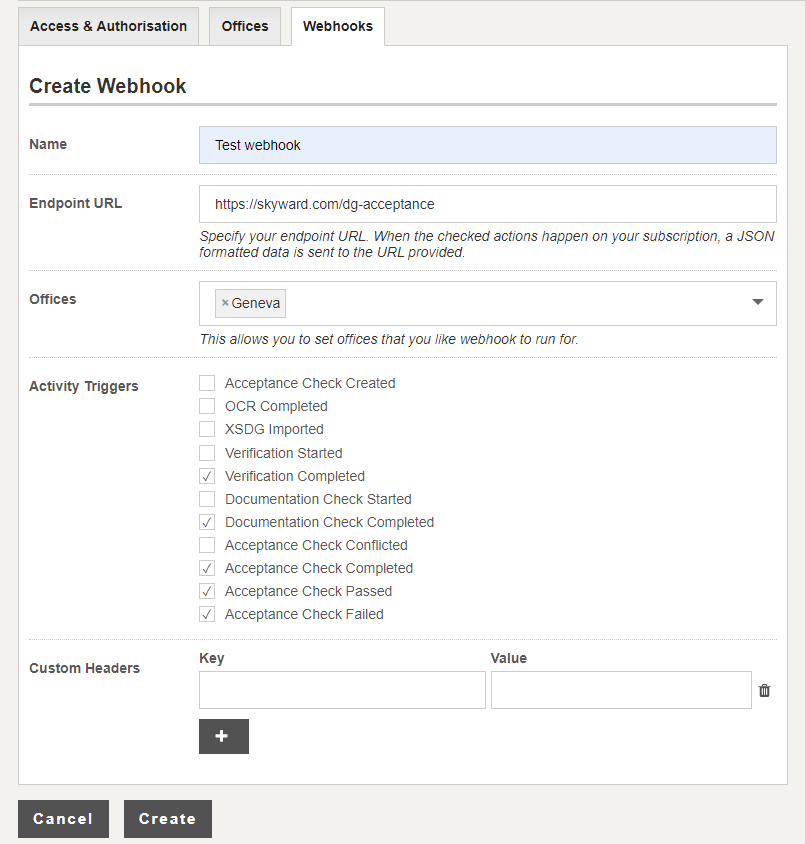
3. The Create Webhook screen is displayed
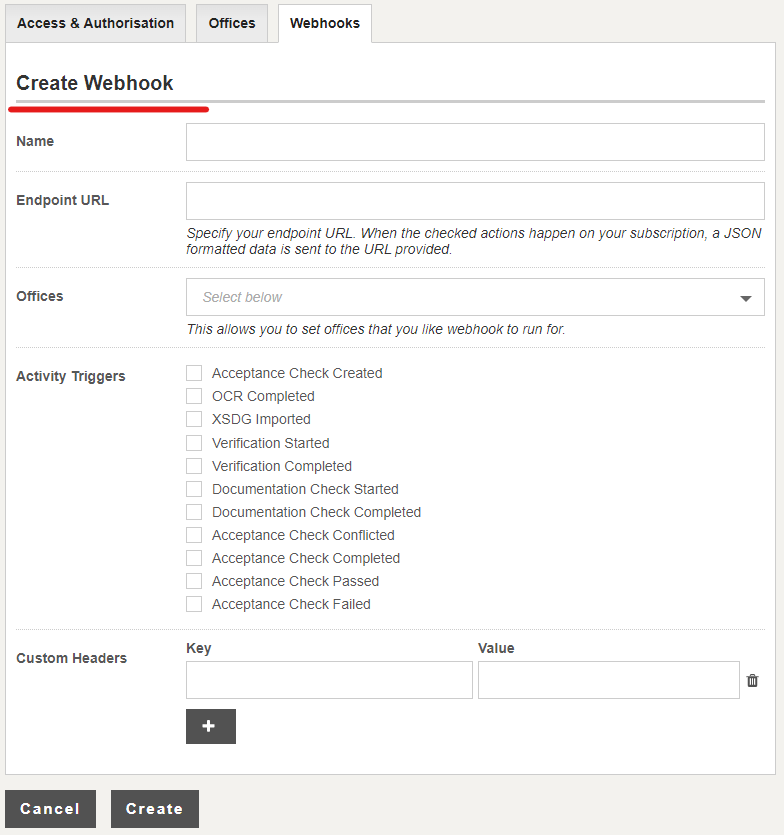
3. Specify the details.
- Name is for your convenience to identify the webhook.
- Endpoint URL is the location (public URL) where the webhook notification is to be sent.
- Offices (optional) is for specifying the office(s) for which the acceptance check status notifications need to be sent using this webhook. You can leave this field blank (empty) to include ALL offices in your subscription.
- Activity Triggers is for specifying the (acceptance check related) events for which the webhook notifications need to be sent. You can select one or more events, however atleast one event must be selected.
- Custom Headers (optional) is for specifying custom headers for your webhook. You can do this at top level for your all webhooks or for a specific webhook. If you set your custom headers at webhook level, then this will suppress global ones and they will only be sent for this webhook.
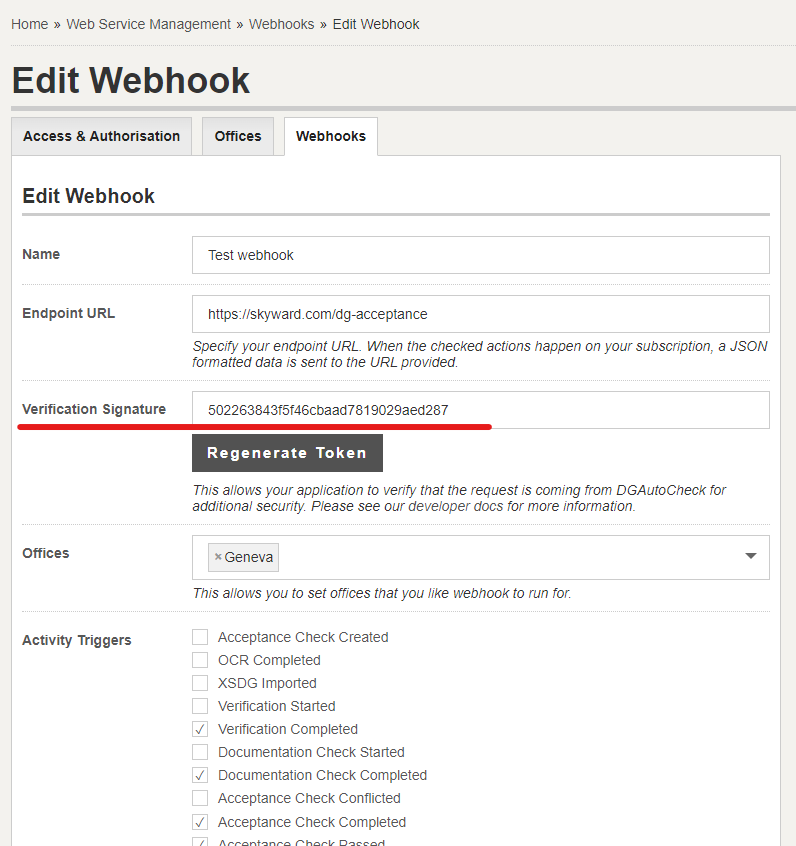
4. Click Save to save the changes. The Verification signature token for the webhook will be displayed. This is for additional security, to allows you to verify that the request is coming from DGAutoCheck. You may use this token in combination with the “X-DGAutoCheck-Signature” header to verify that DG AutoCheck is the sender of the webhook request.
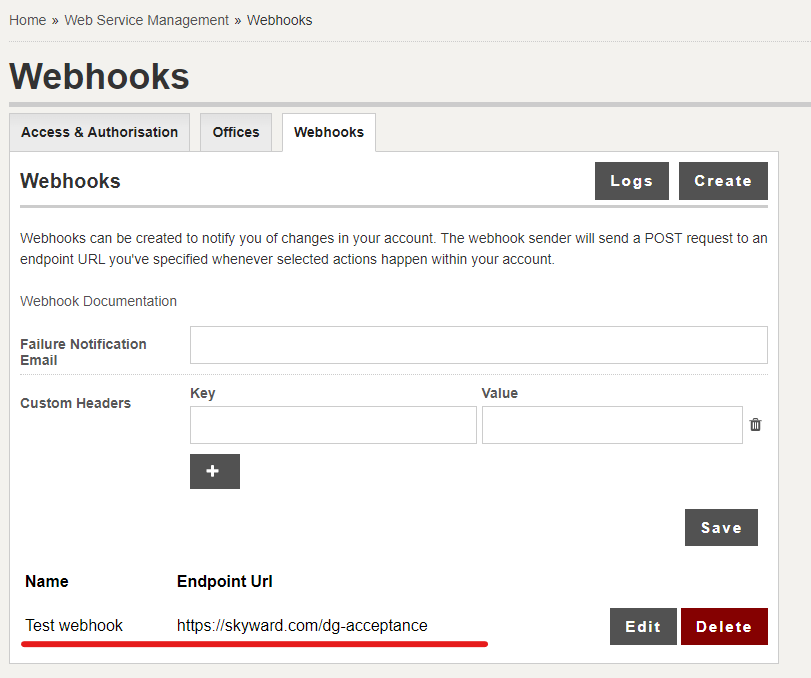
5. Return to the Webhooks screen by clicking the tab. You will see (at bottom of the screen) the details of the new webhook that you created (Name and Endpoint URL).
You will be have the options to Edit and Delete the webhook.
