Set up Auto Send rule
Note: This option is available only to Super Users
To set up auto-send rule:
1. Go to Offices.
2. Click on the office name (e.g. Amsterdam)

3. Click Send by Email and then click Create

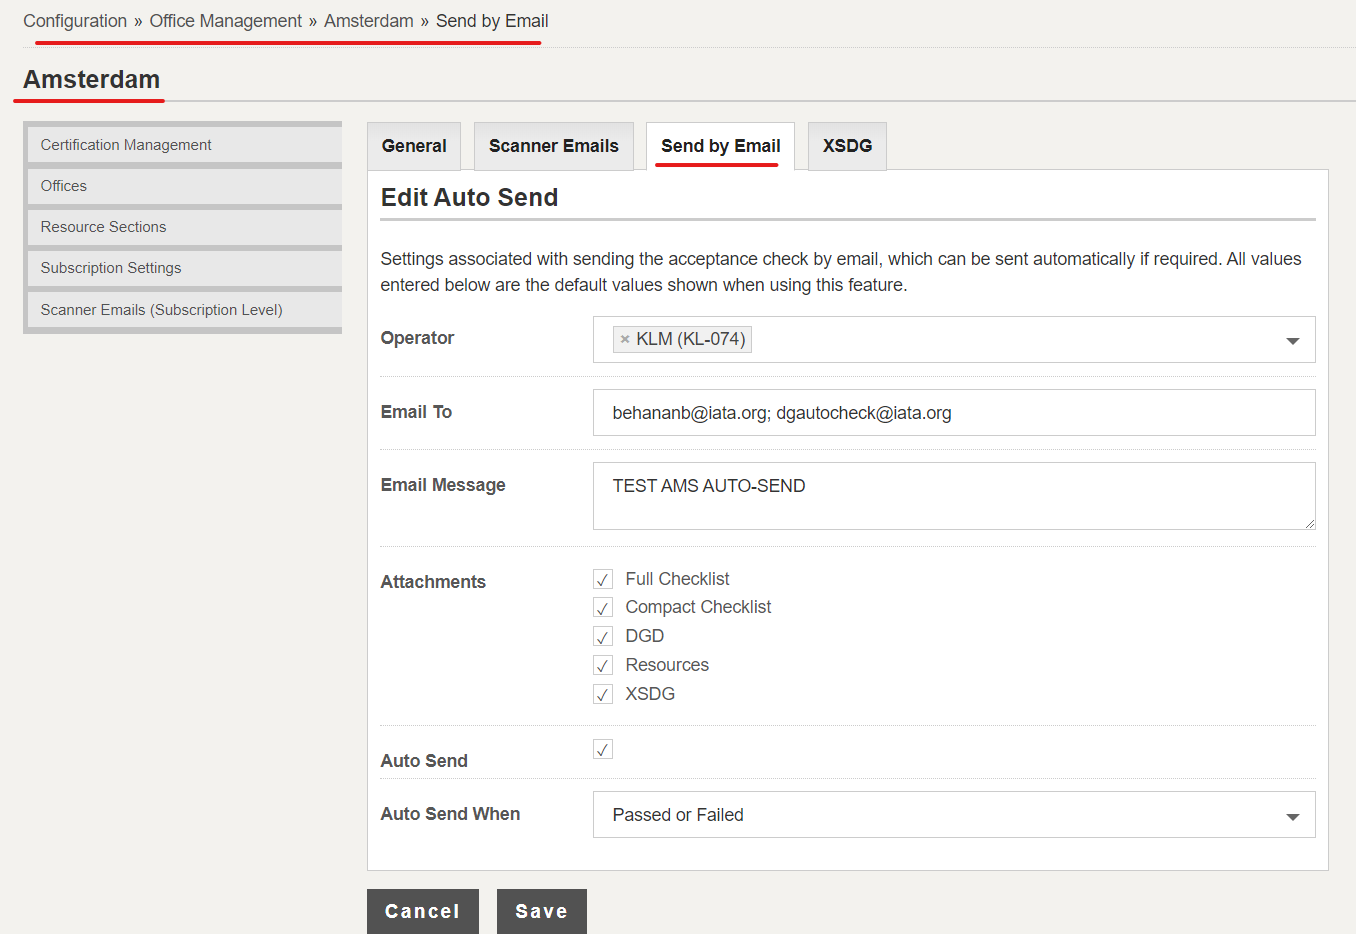
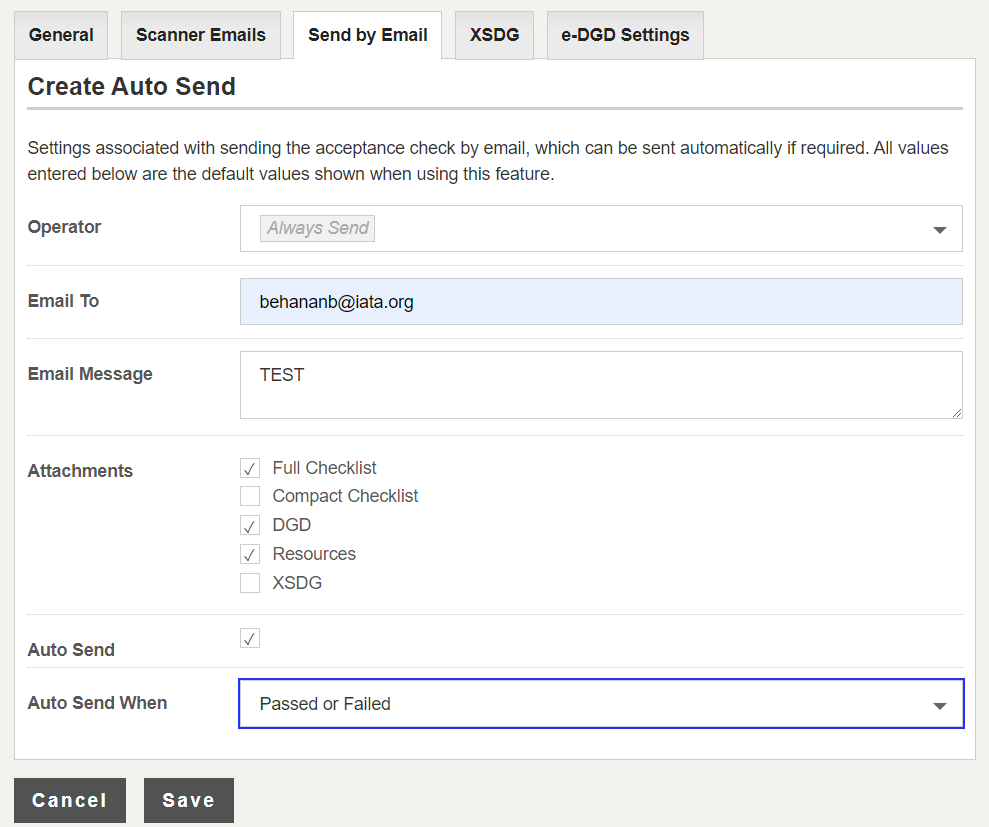
4. The Auto Send configuration screen is displayed. You can configure the Auto Send using the options below.
- Operator: To select the Operator(s) for which the Auto Send should be applied. Leave this field black to apply the Auto Send for ALL operators.
- Email To: To specify the email address(es) where the message should be sent. Note: You can enter multiple email addresses separated by a comma or semi-colon.
- Email Message: To specify the email message.
- Attachments: To specify the attachments for the email message.
- Auto Send: To activate the Auto send (if Auto Send is not activated, the details above will be displayed in the Send by Email screen by default, after an acceptance check is signed off.
- Auto Send When: To specify when the Auto Send should be executed (i.e. when check is Passed only, or when check is Failed only, or both when check is Passed and when check is Failed)

4. Click Save to complete the operation.
Always send
To always Auto Send whenever an acceptance check is signed off, regardless of the Operator, just leave the Operator field blank when creating the Auto Send rule.
