DGD Acceptance
The DGD acceptance process in DG AutoCheck is workflow-driven and every DGD follows the same steps.
There are basically 4 steps in the DG acceptance process in DG AutoCheck:
1. Verification
2. Documentation
3. Packaging
4. Sign off
The DGD acceptance process starts when you open a DGD in the DGD library.
DGD Acceptance screen

The DGD Acceptance screen is composed of 4 tabs:
Each tab is enabled when the previous step has been completed.
The Documentation tab is enabled when the Verification step has been completed (Note: this requirement applies only for paper DGDs; when using e-DGD, the verification step is not required).
The Packaging tab is enabled when the Documentation check has been completed.
The Sign Off tab is enabled when the Packaging check has been completed.
You can use this tab to verify that the data imported by the OCR matches the information on the scanned paper DGD.
This tab is accessible to non-Cat-6 users and Cat-6 users.
You can use this tab to perform the acceptance checks related to the DGD document. Here you will find all check questions pertaining to the DGD document itself or to the identification of the dangerous goods.
This tab is accessible to Cat-6 users only.
You can use this tab to perform the acceptance check related to the visual inspection of the physical package. Here you will find all check questions related to packaging, and including a pictorial representation of the required marks and labels.
This tab is accessible to Cat-6 users only.
You can use this tab to sign off on the acceptance checks. Once the documentation and packaging checks have been completed, the Cat 6 user can sign off the DGD as either "Passed" or "Failed".
This tab is accessible to Cat-6 users only. Note:This tab can be used to abort an ongoing acceptance check if there are major issues preventing a normal process.
Under each of the 4 tabs, you have subsections which contains information and actions you can perform. They can be displayed in list mode or tab mode.
Types of checklist questions:
There are 3 types of questions in DG AutoCheck as follows:
- Default: this question has been automatically answered by DG AutoCheck as "Yes" or "N/A" based on default settings, as it is unable to verify based on the data in the DGD data
- AutoCheck: this question has been automatically answered by DG AutoCheck based on the rules in the DGR
- User prompt: this question has to be manually answered by you (as Cat 6 user)
Each question type is identified by an icon the right-hand side of the screen as shown below.

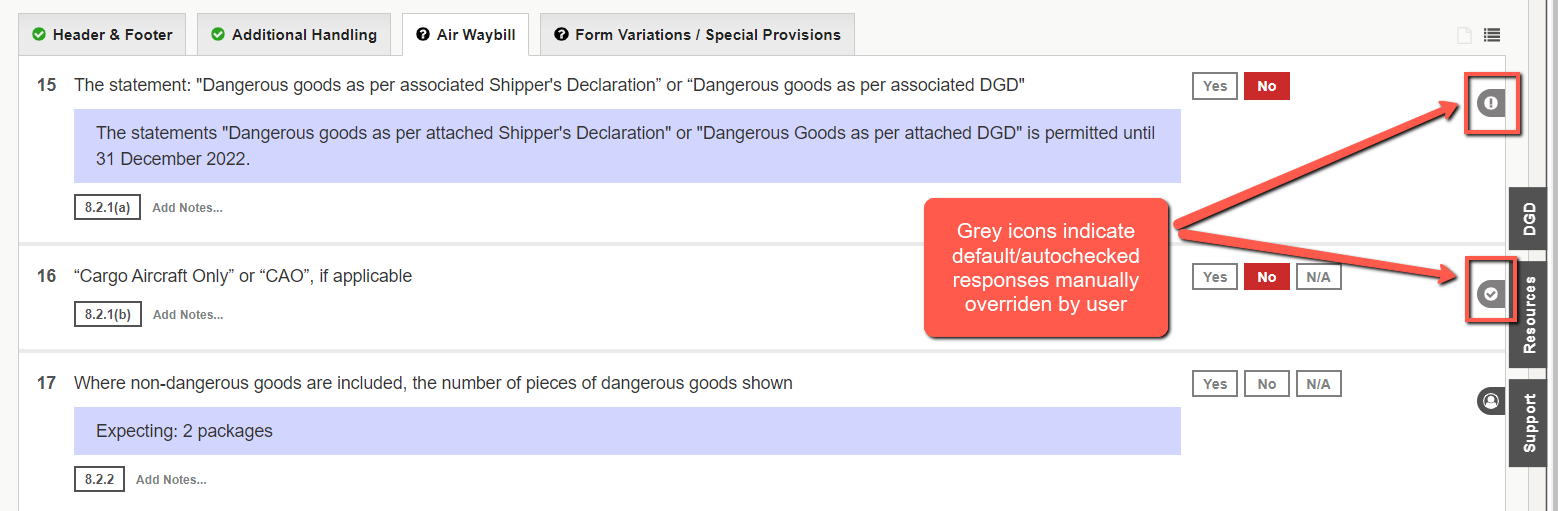
Overriding Default and AutoCheck responses
For Default and AutoCheck questions, you (as Cat 6 user) can always modify the responses provided by system.
If you decide to change the response for a question which has a Default or an AutoCheck answer, then the icon next to it will turn from blue to grey as shown below.
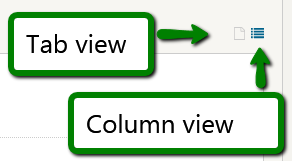
Changing the display mode of the questions
By default, the questions are grouped in tabs by check nature, following the paper checklist headers. Example:

You need to click on each tab to answer the questions. However, you may prefer a view where all the check questions are in one column.
For this, you can switch to Column view. To switch the mode, click on the corresponding icon on the right and side of the window as shown below.
Viewing the DGD
You can view the currently processed DGD at any time of the acceptance process by clicking on the "DGD" tab on the right hand side of the screen.