Verification wizard
The wizard will take you step-by-step through all the sections to be verified.
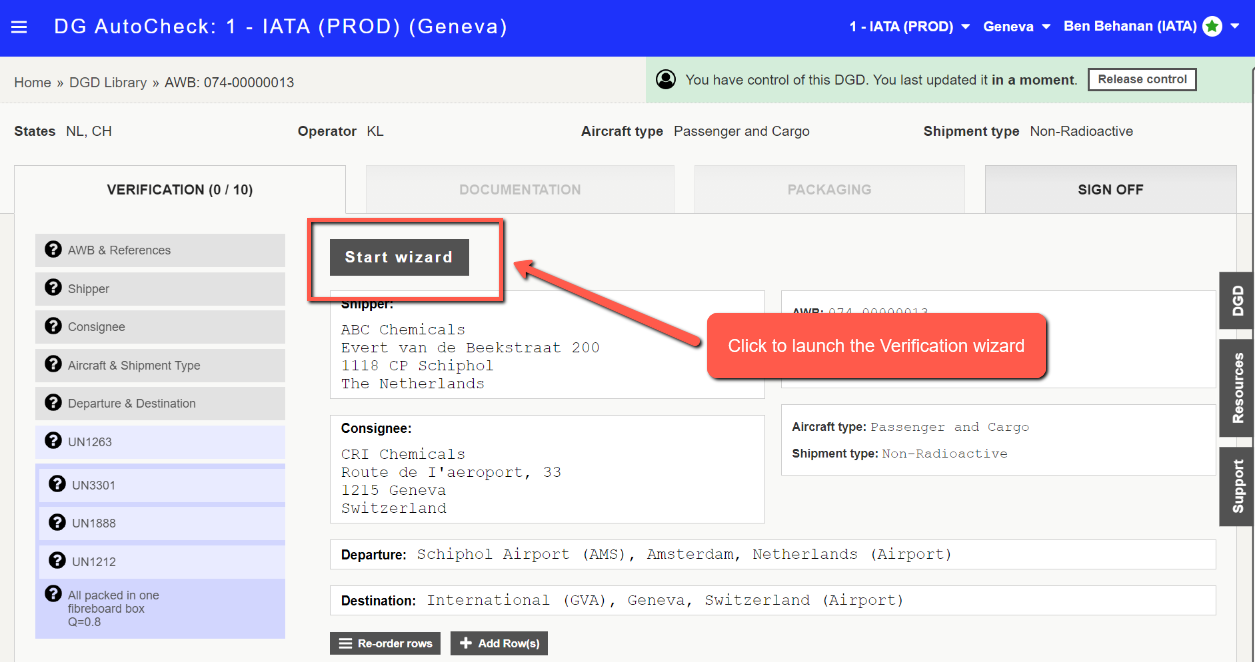
Click Start wizard to launch the verification wizard.
Wizard screen layout
The top section of the screen displays the data read by the OCR, and the bottom section of the screen displays the section of the scanned DGD image.
During the verification, you need to make sure that the OCR captured data in the top section matches the image on the bottom.

For sections containing dangerous goods data, the OCR read data is displayed in yellow boxes.

Navigation buttons
- Previous: saves changes and takes you to the previous section
- Next: saves changes and takes you to the next section
- Close: saves changes and brings you back to the verification screen

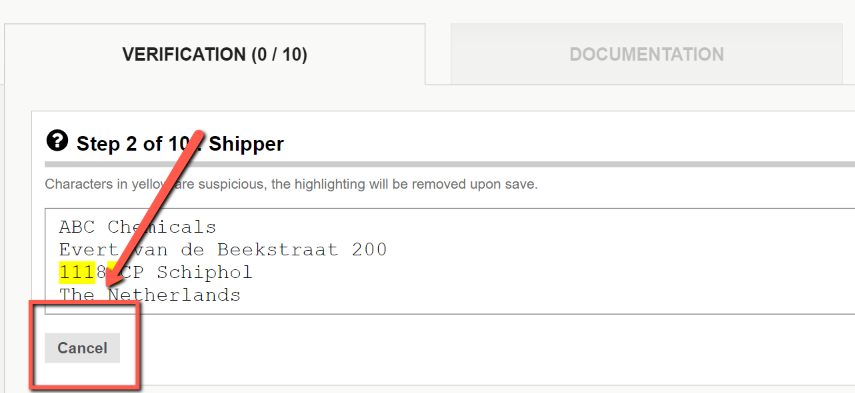
Note: To return to the verification screen without saving changes, you can click Cancel.
Following are the various sections of the verification screen.
Section 1: AWB & References
This is the first step in the wizard. Here you can verify the Air Waybill number data captured by the OCR.
There are different situations possible:
a. AWB number is present on the DGD, but not read by the OCR. In such case, enter the AWB number.
b. AWB number is present on the DGD, but not read correctly by the OCR. In such case, enter the correct AWB number.
c. AWB number is handwritten on the DGD, and might not be legible. In such case, enter what you can read.
d. AWB number is absent on the DGD. In such case, you can leave the field blank.
You can also enter the House Waybill and Shipper's reference, if these are available on the DGD. Both these are not auto-populated by the OCR.
When done, click Next to save changes and move to the next section.

Section 2: Shipper
In this section you can verify the shipper data captured by the OCR.
You can edit the data in this field, to match the scanned DGD image below.
The yellow highlighted text is where the system is unsure about the accuracy of the OCR conversion; it is only an aid, it does not mean it is wrong.
When done, click Next to save changes and move to the next section.

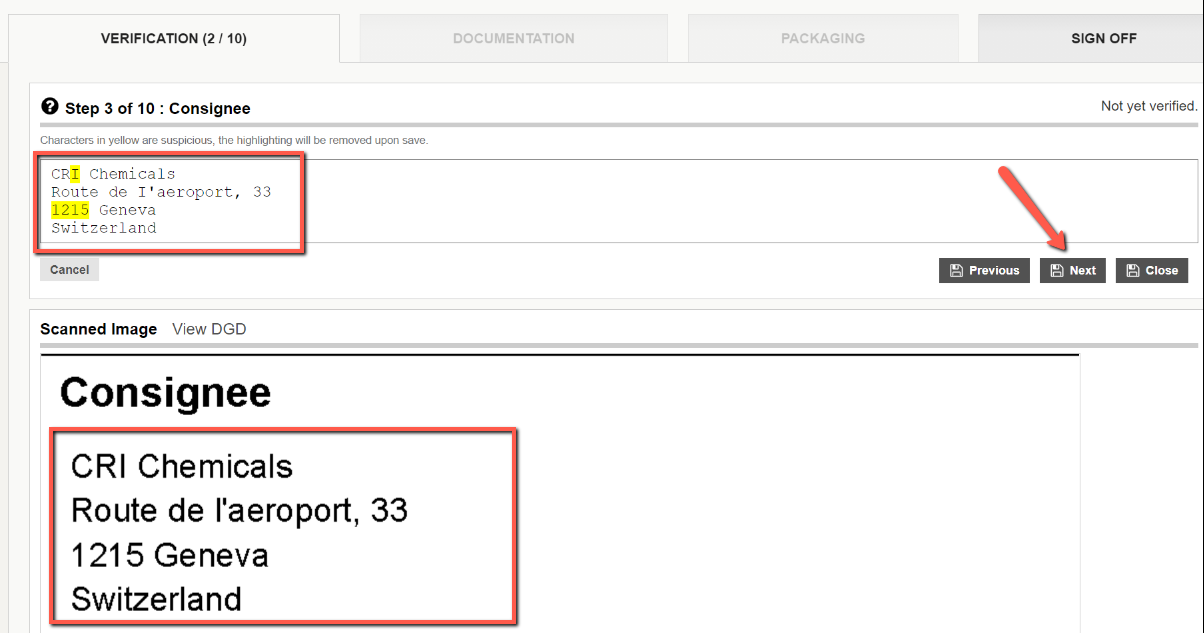
Section 3: Consignee
In this section you can verify the consignee data captured by the OCR.
You can edit the data in this field, to match the scanned DGD image below.
The yellow highlighted text is where the system is unsure about the accuracy of the OCR conversion; it is only an aid, it does not mean it is wrong.
When done, click Next to save changes and move to the next section.
Section 4: Aircraft and Shipment type
In this section you can verify the aircraft and shipment type data captured by the OCR.
The values in the drop-down list are auto-selected by system, based on data read by the OCR.
Sometimes an incorrect value may be auto-selected, or no value may be auto-selected, because the strikeout line of the eliminated option is too fine and OCR is not able to read properly. In such cases, you can manually select the required value from the drop-down list.
When done, click Next to save changes and move to the next section.
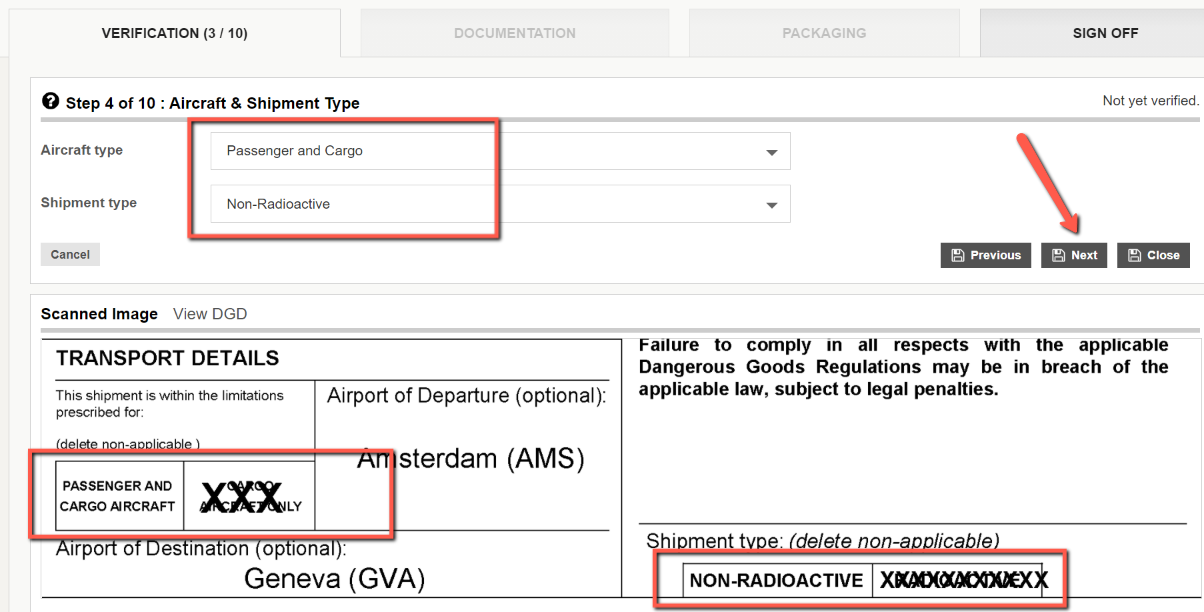
Note: If OCR is unable to read the Aircraft type and/or Shipment type, it will display as "Not marked on DGD". You need to select the required value from the drop down list.

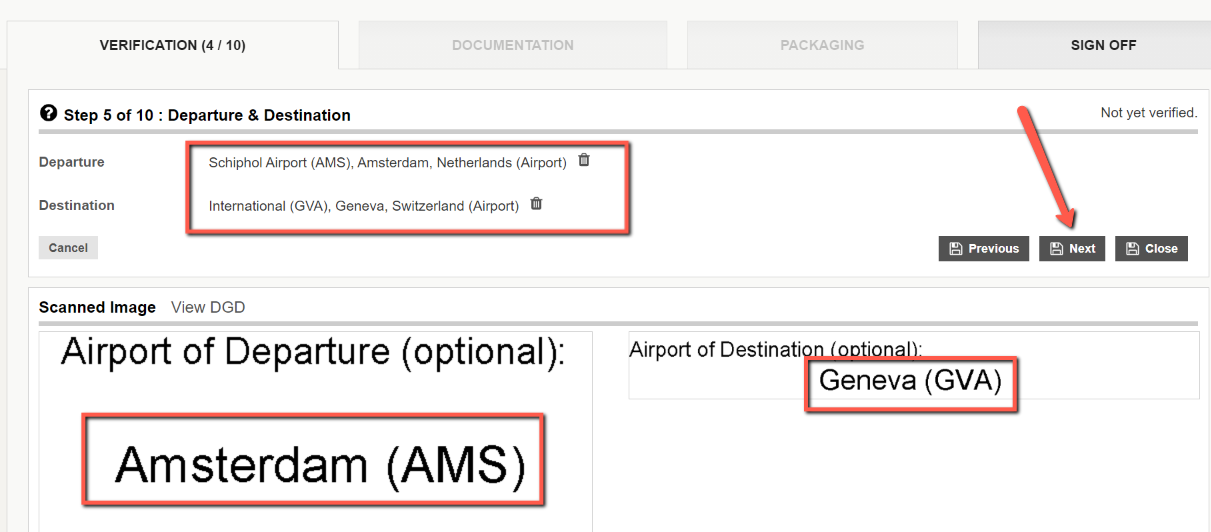
Section 5: Departure & Destination
In this section, you can verify the departure and destination airports captured by the OCR.
The departure and destination airports are optional on the DGD. Moreover, the way the information is provided can vary (airport code, city name, etc).
So this data often requires user verification.
If an airport was not recognized by the OCR, you can manually enter the airport code, or city name. A matching list of airport codes will be displayed, and you can select the appropriate one.
While the exact airport is not critical for the acceptance check, it is important to ensure the country (or location) of the airport is correct, as that will impact the state variations applied.
When done, click Next to save the changes and move to the next section.
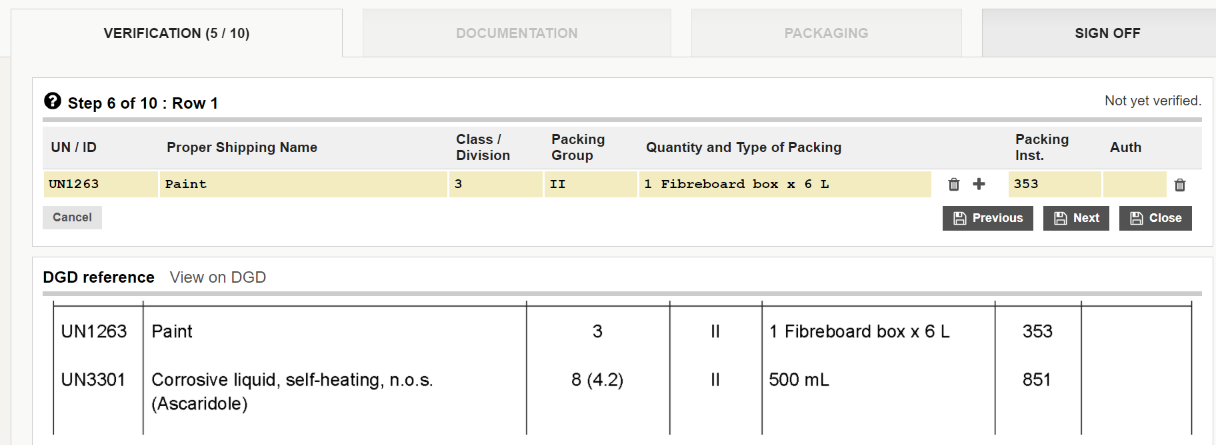
Section 6 (and onwards): Dangerous goods rows
In these sections you can verify the dangerous goods data captured by the OCR.
Each line of dangerous goods information on the DGD is shown as a separate row during the verification process.
If the DGD has multiples lines, you will have as many rows in the verification process.
Note: Enhanced verification features are provided to assist with the verification of dangerous goods rows
Note: Tips for verification of dangerous goods rows
You need to be very vigilant with the information displayed. For example, the OCR could have read a lower case l (alphabet, lower case of alphabet L) instead of a 1 (number), or 0 (number) instead of an O (alphabet). Click inside the yellow boxes to verify the data that system has read.
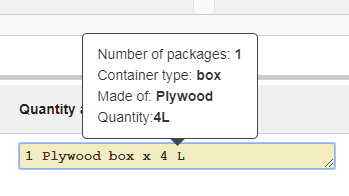
A particular important field to check is the Quantity and Type of Packing. To check the accuracy of the data, click inside the yellow box, and a pop-up is displayed that shows how DG AutoCheck has interpreted the information read.
In the example below, the tooltip tells you that there is "1" package, the container type is "box", made of "Plywood" and the quantity is "4L".
This is read correctly.
Now, let's consider another example where the OCR has read "0" (zeroes) instead of "O".
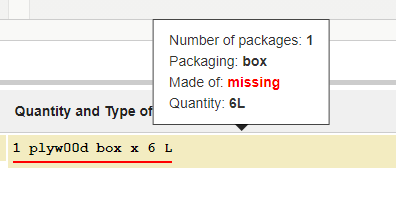
Here "Plyw00d" was not interpreted (i.e. not understood) by DG AutoCheck and therefore ignored. Because system has read 0 (number) instead of O (alphabet). That should give you a clue where correction is required.
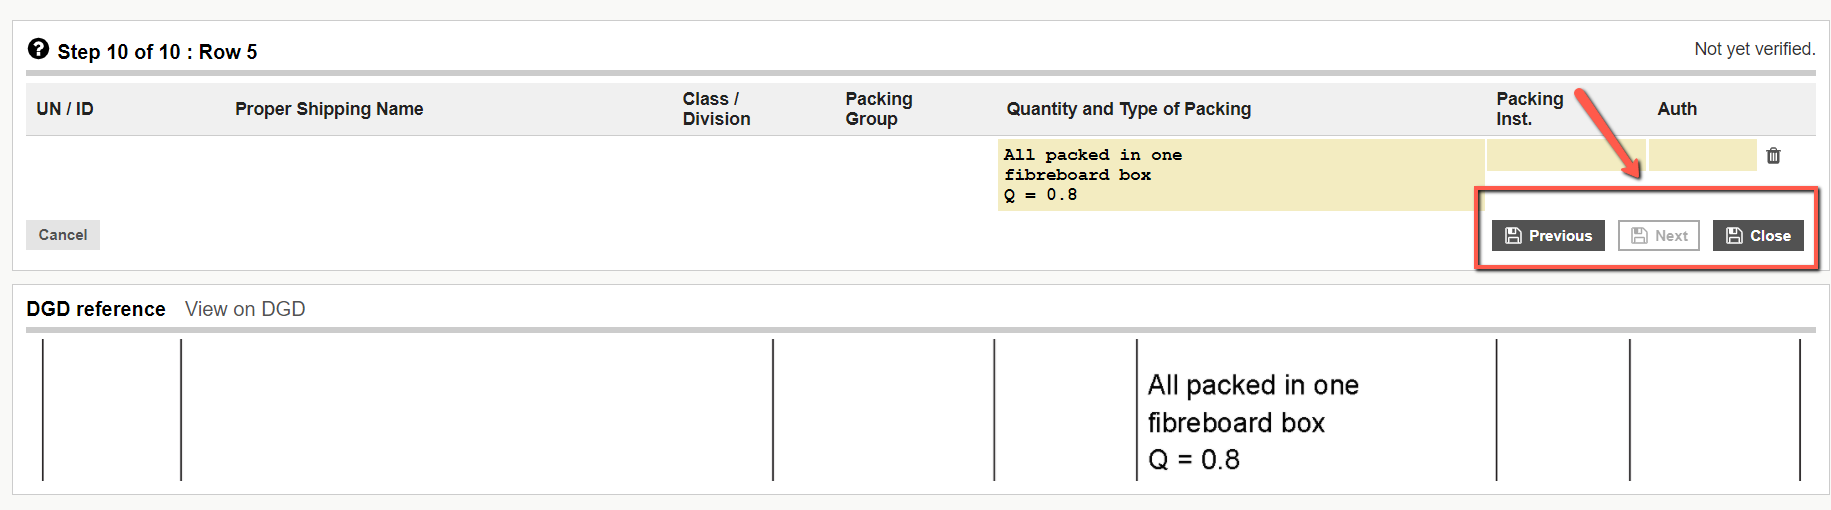
You can click the + sign to add a row and enter the information, and you can click the "trash can" icon to remove an invalid line.

After verifying the current row, click Next to save the changes and move to the next row.
When you reach the last row, the Next button will be disabled.
Click Close to save changes and return to the verification screen.